Elevation Tab
Set the basic panel layout, sizing and framing system details.
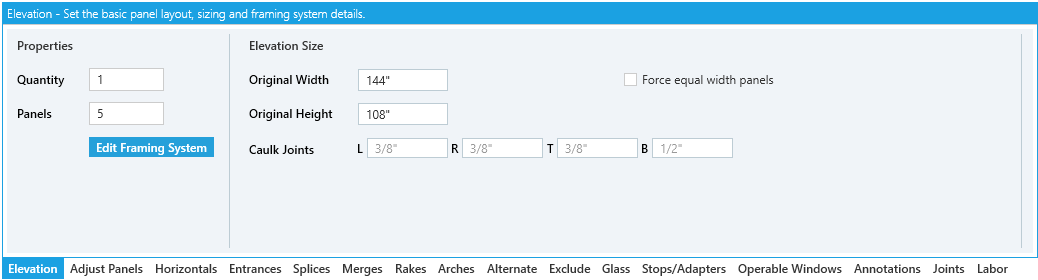
You'll need Original Width, Original Height, and Panels filled out before a preview of the elevation can be drawn.
Options
-
Quantity- Number of instances of this frame in the job. Cuts, glass, labor etc. for this frame will be multiplied by this number. -
Panels- Number of glass panels between the left and right jamb. AKA "Bays" or "Columns".- To set fixed dimensions, including adding a bulkhead / knee wall, use the Adjust Panels tool tab.
- To add horizontal framing, use the Horizontals tool tab.
-
Edit Framing System- Allows you to modify the applied framing system.- Changes affect the system in the job, not the catalog; however, it can be sync'd to the catalog. See Local & Global Edits for more details.
-
Original Width- The rough opening width. May be net frame width if you do not enter caulk joints. -
Original Height- The rough opening height. May be net frame height if you do not enter caulk joints.
NOTE: Some tool tab commands applied to the frame, or settings, may alter the width or height, which is why it is
Original WidthandOriginal Heightopposed toWidthandHeight. If the actual width or height is different from the original, it will be indicated here next to the input boxes.
-
Caulk Joints- Modify the frame's caulk joint sizes for this frame only.L- Caulk joint at the left jamb.R- Caulk joint at the right jamb.T- Caulk joint at the top / head.B- Caulk join at the bottom / sill.
-
☑
Force equal width panels- Force all equal panels widths to be exactly equal. This may shrink the width of the elevation due to fractional rounding.
If you're updating the number of panels later in the process, try the Insert Panels / Remove Panels option in the Adjust Panels tab for more control over the changes.