Glass Tab
WinBidPro will include some glass options by default. These do not include pricing and should be treated like templates, not actual products.
To accurately estimate glass costs, use these templates to build out local glass options before applying them to your elevations. See Configuring Glass Products for more details.
Apply glass products to selected panels.
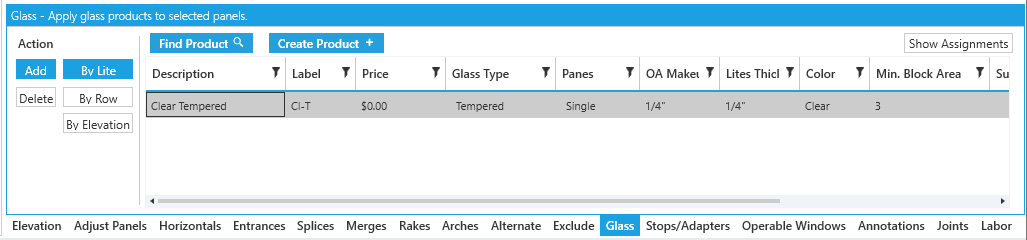
The Glass tool lists glass products loaded into the current job. Once applied, your panels will update to have product labels and any color/fill settings you specify for that product.
The list shows Start by adding a glass product to the job if no products are loaded. For glass counts to be reported, glass products need to be applied to panels.
Setting the Product List
The Glass tool tab uses glass products to count glass in your elevation.
-
Find Product- Load a glass product to a job. -
Create Product- Configure a new glass product. See Configuring Glass Products for more details. -
Show Assignments- Toggle a list of glass assignments in the current elevation.
Modifying Glass Products
Using the product list, you can make adhoc changes to glass products loaded into the job by double-clicking the values.
You can use these options to help identify glass assignments in the elevation:
-
Fill Pattern- Change the fill / hatch pattern drawn on the surface of the glass. -
Draw Color- Change the color of the glass.
Assigning Glass
Process
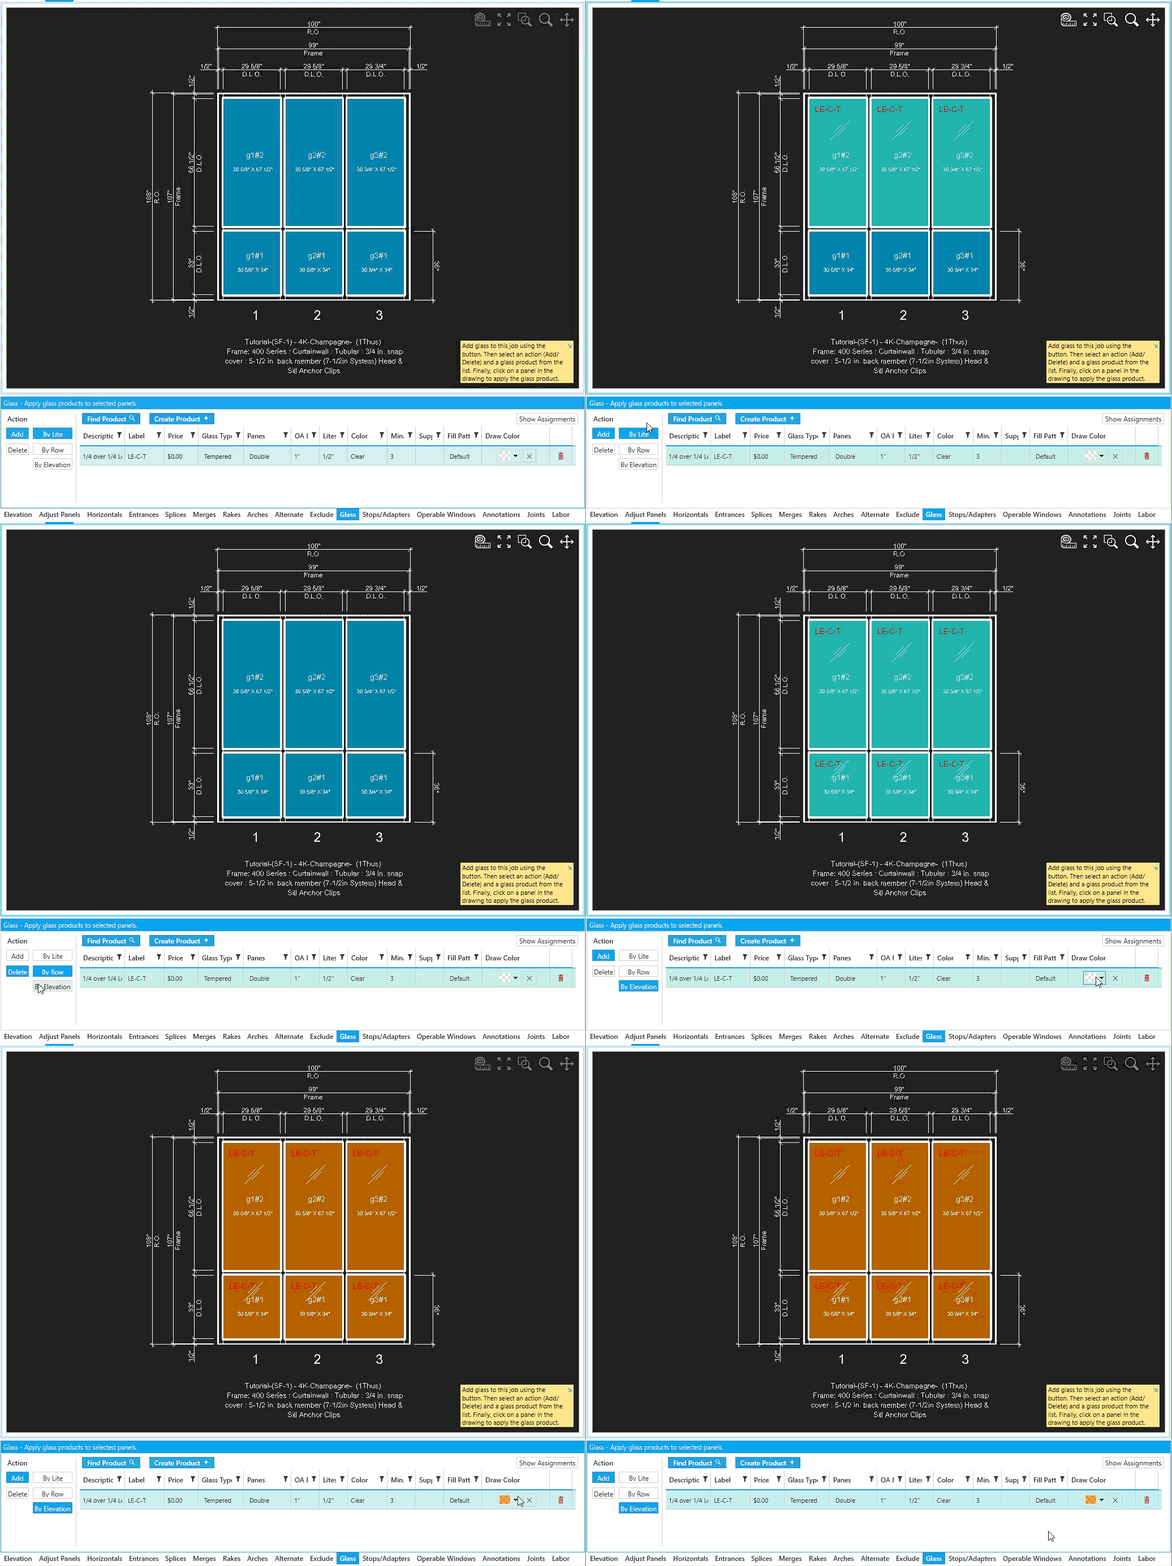
To assign glass, make sure a glass product is loaded. Select the product, click Add, and click panels to apply it.
Options
-
Add- Assign the current glass product to the panels you click. -
Delete- Remove glass product from the panels you click.
Use these settings to speed up assignment:
-
By Lite- Default option.AddorDeleteglass to individual panels. -
By Row-AddorDeleteglass to a full row of panels. -
By Elevation-AddorDeleteglass to all panels in the elevation.