Grouping & Filtering Lists
Part lists and summaries play a major role in your estimates, but these lists can be lengthy. You can use groups and filters to help organize them, and even set multiple groups and filters at the same time for a highly customized view.
-
Groups break your list up into sections by columns and their values.
-
Filters let you limit your lists to specific entries in each column.
-
Quick Filters are simplified filters used in part selection. These only show up in a few specific places -- for example, selecting a door frame for your entrance.
Groups
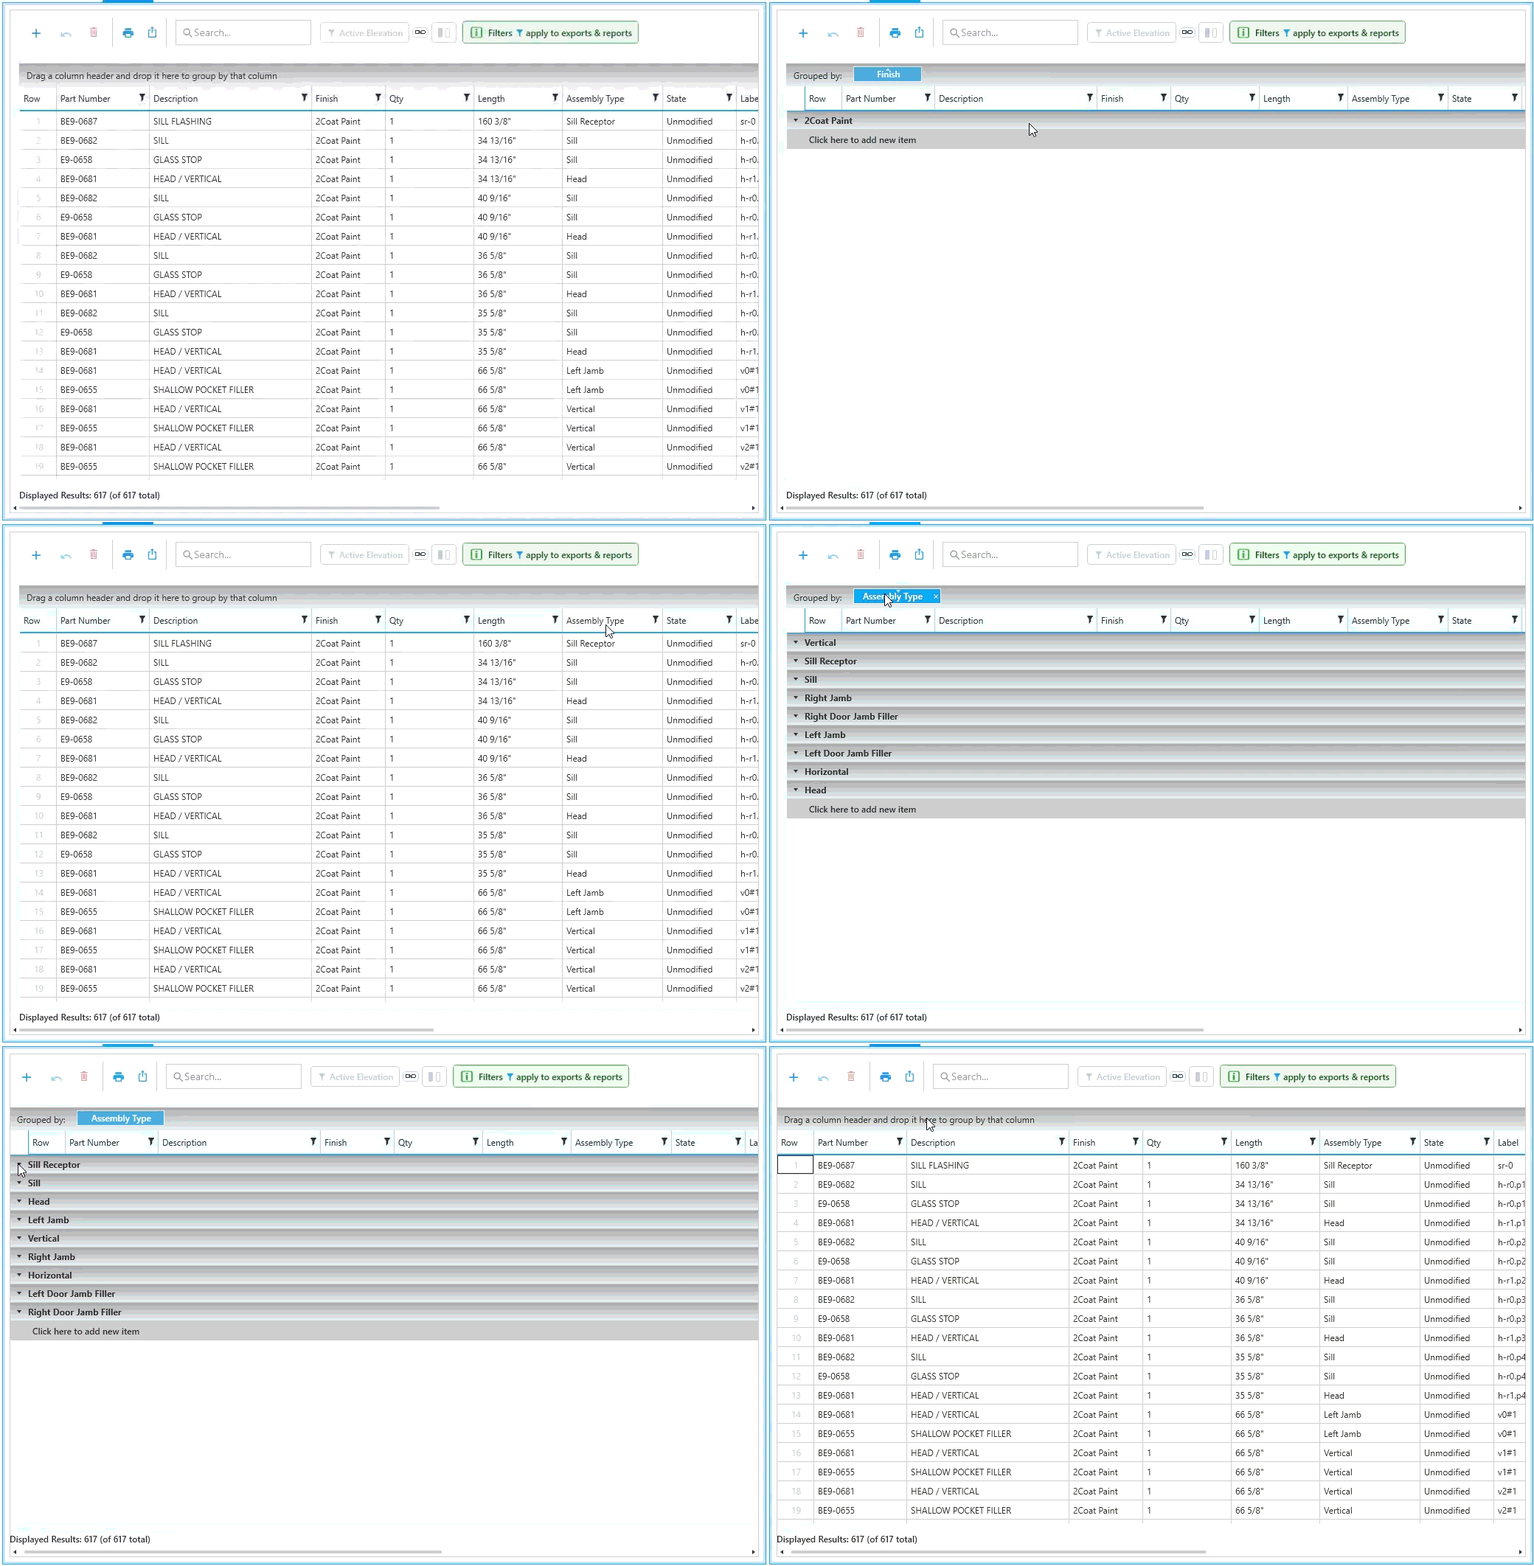
To set a group, drag a column header into the group area at the top of the list.
Once a group is active, it'll break your list up into sections based on the unique values in this column. These sections can be expanded or collapsed by pressing the ▲ / ▼ on the far left of each section header.
If a list window has active groups, you'll see the column name in light blue in the group area. You can cycle through sorting options by clicking the center of the blue box. You can remove this grouping by clicking the X that appears when you hover over the blue box.
Filters 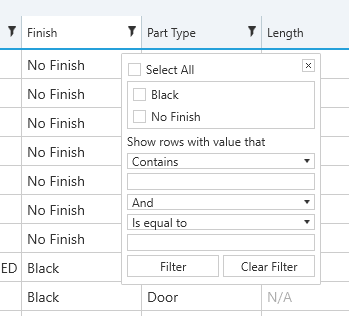
To set a filter for a column, click the  filter icon in the column header.
As you adjust the filter settings, the list will update to show a preview. You can confirm the settings by clicking the Filter button, or remove them with the Clear Filter button.
Filtering options are broken out into value filters and conditional filters -- see the sections below for more details.
Filter by Value
The top portion of the filter sub-menu is your value filter. This lists each unique value and lets you turn each of them on or off. If you need to filter by partial values, see below for conditional filters.
-
☑
Select All- When checked, no values are hidden.- If no values are checked, the filter will default to this even if unchecked.
-
Below
Select Allis a list of values set in this column, each with a ☑ checkbox. If one or more values are checked, only line items with those values will be visible.- If all the entries in this column are empty, you'll see
[null]instead.
- If all the entries in this column are empty, you'll see
Example - Only show systems with a black finish
- Click the filter icon in the
Finishcolumn header. - Check ☑
Blackin the listed values. - Click
Filter
Filter by Condition
Below the value filters, you'll see Show rows with value that -- this is the conditional filter section.
Conditional filters are based on rules instead of values. This can help if you need to filter by a shared trait or part of a value, even when those values don't match each other.
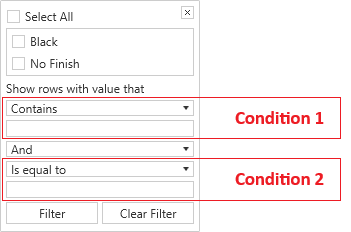
These rules are set using operators and inputs - see Setting Conditions below.
You can set up to two conditions at once. You can also set how those conditions relate to each other using the And / Or option - see Pairing Conditions below.
Setting Conditions
Conditions are set by pairing an operator and an input.
-
Operators are a rule that tells the filter what to do when it finds the input.
- Some operators like
Is emptyare a complete condition and don't need an input. When you pick these operators, the input box will be locked.
- Some operators like
-
Inputs can be anything you type - this is what the filter looks for.

Match Case- By default, case matching is off for filters. You'll see this toggle for some columns likeElevation Mark, where upper and lower case can be especially important.
Example - I want to set a conditional filter for the Part Type column in my parts list.
If I set the first line of my condition to Contains and type e in the second line, my parts list will be filtered to include part types like Screws and End Dam.
The filter will hide the part type Anchors because it doesn't contain the letter e.
Pairing Conditions
The setting between the two conditions is how the conditions relate to each other. These options include:
-
And- Only line items that meet both conditions will remain visible. -
Or- Line items that meet one or the other condition (or both) will remain visible. Everything else will be hidden.
If you don't have a completed rule for the second condition, this setting is ignored.
Example - In the framing system catalog, I want to see lines with "Thermal" in their description but not "Pre-Glazed".
- Click the filter icon in the
Descriptioncolumn header. - Leave all value filters unchecked or check ☑
Select All
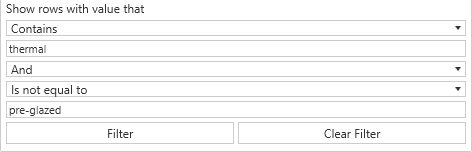
- Set the first condition:
- Select the
Containsoperator on line 1 - Type
thermalas the value in line 2
- Select the
- Select
Andon line 3 - Set the second condition:
- Select the
Does Not Containoperator on line 4 - Type
pre-glazedas the value in line 5
- Select the
- Click
Filterto confirm the settings.
Quick Filters 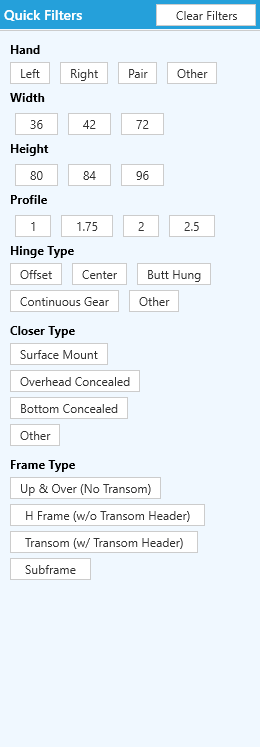
Where quick filter menus are active, they enable users to quickly find a specific configuration. See the image to the right for an example from the Door Frames catalog.
Each section of the quick filter is pulled from commonly filtered columns, and presents each unique value in the current catalog.
- Click the values to toggle them on / off to set your filtered list.
- Click
Clear Filtersto reset all toggles to off.
The quick filter menu will be expanded when you first open the catalog. Once you move away from it, it'll collapse the menu and store it on the left edge of the window. To expand it again, hover over the white box on the left edge labeled Quick Filter.